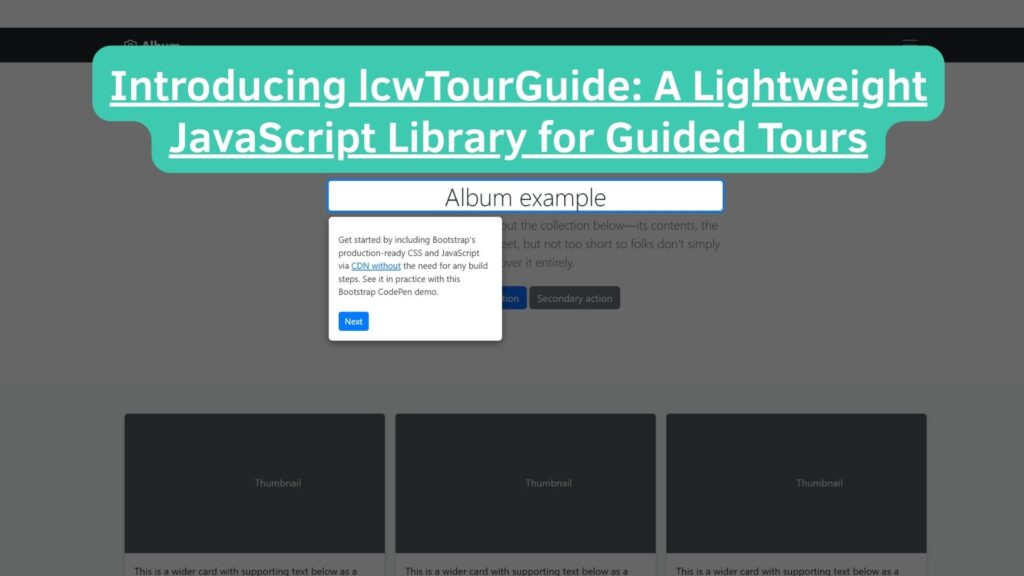
lcwTourGuide is a simple and effective JavaScript library designed to help you create interactive guided tours on your website. Whether you’re showcasing a new feature, guiding users through a complex UI, or just improving the onboarding experience, lcwTourGuide has you covered with an easy-to-integrate solution.
Key Features
Element Highlighting : Easily highlight elements on your page to grab attention.Custom Tooltips : Display custom tooltips with text to guide users at each step.Navigation Controls : Let users navigate between steps using “Next” and “Previous” buttons.Callbacks : Trigger events at different stages of the tour with callbacks for onStart, onStep, and onEnd.Simple Integration : Integrate via CDN or npm with minimal setup.
Installation
Via CDN
To get started quickly, simply add the following links to your HTML:
<link rel="stylesheet" href="https://cdn.jsdelivr.net/gh/LearnCodeWeb/lcwTourGuide@v-1.0/src/lcwTourGuide.css">
<script src="https://cdn.jsdelivr.net/gh/LearnCodeWeb/lcwTourGuide@v-1.0/src/lcwTourGuide.js"></script>
This will load both the CSS and JavaScript files needed to use lcwTourGuide in your project.
🚀 Usage
1. Mark Elements for the Tour
To start, you’ll need to mark elements on your page with the data-lcw-tour-step and data-lcw-tour-text attributes. Here’s how you can do it:
<button data-lcw-tour-step="1" data-lcw-tour-text="Click here to create a new item">
  New Item
</button>

<input type="text" data-lcw-tour-step="2" data-lcw-tour-text="Enter the name here">

<div data-lcw-tour-step="3" data-lcw-tour-text="Finally, click Save">
  Save
</div>
data-lcw-tour-step="1": Defines the order of the steps.data-lcw-tour-text="...": Specifies the text that will appear in the tooltip.
2. Initialize the Tour
Next, you need to initialize the tour and define the callbacks for when the tour starts, steps change, or ends. Here’s how you can do it:
document.addEventListener('DOMContentLoaded', () => {
  const tour = new lcwTourGuide({
    onStart: () => console.log("✅ Tour started"),
    onStep: (index, el) => console.log(`➡️ Step ${index + 1}:`, el),
    onEnd: () => console.log("🏁 Tour finished")
  });

  tour.start();
});
This will start the tour when the page is fully loaded, and the console will log the current step as you progress through the tour.
⚙️ Options
lcwTourGuide provides a simple configuration with the following options:
Option Type Default Description onStartFunction () => {}Called when the tour starts onStepFunction (index, el) => {}Called when a step is displayed onEndFunction () => {}Called when the tour ends
Each of these functions allows you to hook into the tour lifecycle and add custom behavior when the tour starts, when a step changes, or when the tour finishes.
🎨 Styling
By default, lcwTourGuide comes with a basic style for tooltips and highlighted elements. You can customize these styles to better fit your design:
.lcw-tour-tooltip {
    position: absolute;
    background: #ffffff;
    color: #444;
    padding: 16px;
    border-radius: 6px;
    max-width: 280px;
    z-index: 10001;
    font-size: 14px;
    box-shadow: 0 4px 12px rgba(0, 0, 0, 0.4);
}

.lcw-tour-tooltip button {
    margin-top: 10px;
    margin-right: 5px;
    padding: 5px 10px;
    border: none;
    background: #007bff;
    color: white;
    border-radius: 4px;
    cursor: pointer;
}

.lcw-tour-tooltip button:hover {
    background: #0056b3;
}

.lcw-tour-overlay {
    position: fixed;
    top: 0;
    left: 0;
    width: 100vw;
    height: 100vh;
    background: rgba(0, 0, 0, 0.6);
    z-index: 10000;
}

.lcw-tour-highlight {
    position: relative;
    z-index: 10002;
    box-shadow: 0 0 0 4px rgba(0, 123, 255, 0.7);
    border-radius: 4px;
    background-color: white;
}

.lcw-tour-close {
    position: absolute;
    top: 8px;
    right: 10px;
    color: white;
    font-size: 18px;
    cursor: pointer;
    font-weight: bold;
}

.lcw-tour-close:hover {
    color: #ff6b6b;
}
Feel free to tweak these styles to match your website’s theme.
📜 License
lcwTourGuide is open-source and released under the MIT License, meaning it’s free to use for both personal and commercial projects.
🤝 Contributing
We welcome contributions from the community! If you have suggestions, bug fixes, or new features in mind, feel free to fork the project, make your changes, and submit a pull request. Github Link